01/12/2017
replacing an office chair gas cannister
The office chair I use in my apartment has had a broken gas cylinder for a while now. I couldn't adjust the height of the chair, as soon as I sat down, it was at its lowest adjustment. It also won't stay down. Every time I stand up it springs back to its maximum extension. This got annoying pretty quickly, so I fixed this problem temporarily by tying some paracord around the frame of one of the arms and the base of the chair, this kept the chair locked in its lowest position.
One of the things I got over the holidays was a new gas cylinder. I was eager to replace it, except most of the replacement procedures call out a pipe wench which I didn't have. The cylinder press fits into both the base of the chair and the seat bottom. On some models the piston can be hammered out from both the top and the bottom, but on my chair the top of the piston wasn't exposed, even if the chair bottom was removed from the metal mount. I wasn't about to buy a $20 pipe wrench to repair a chair worth less than that, so I had to improvise. I tried my channellocks first to no avail.
I remembered I had bought some half inch diameter tool steel earlier in the year (I was thinking about making my own engraving tools) that was going unused. My drill bit set conveniently goes up to a half inch drill, so naturally, I started drilling. I drilled a pilot hole first, and then did a size between my pilot and the 1/2 inch bit, before finally drilling the hole to its final size.
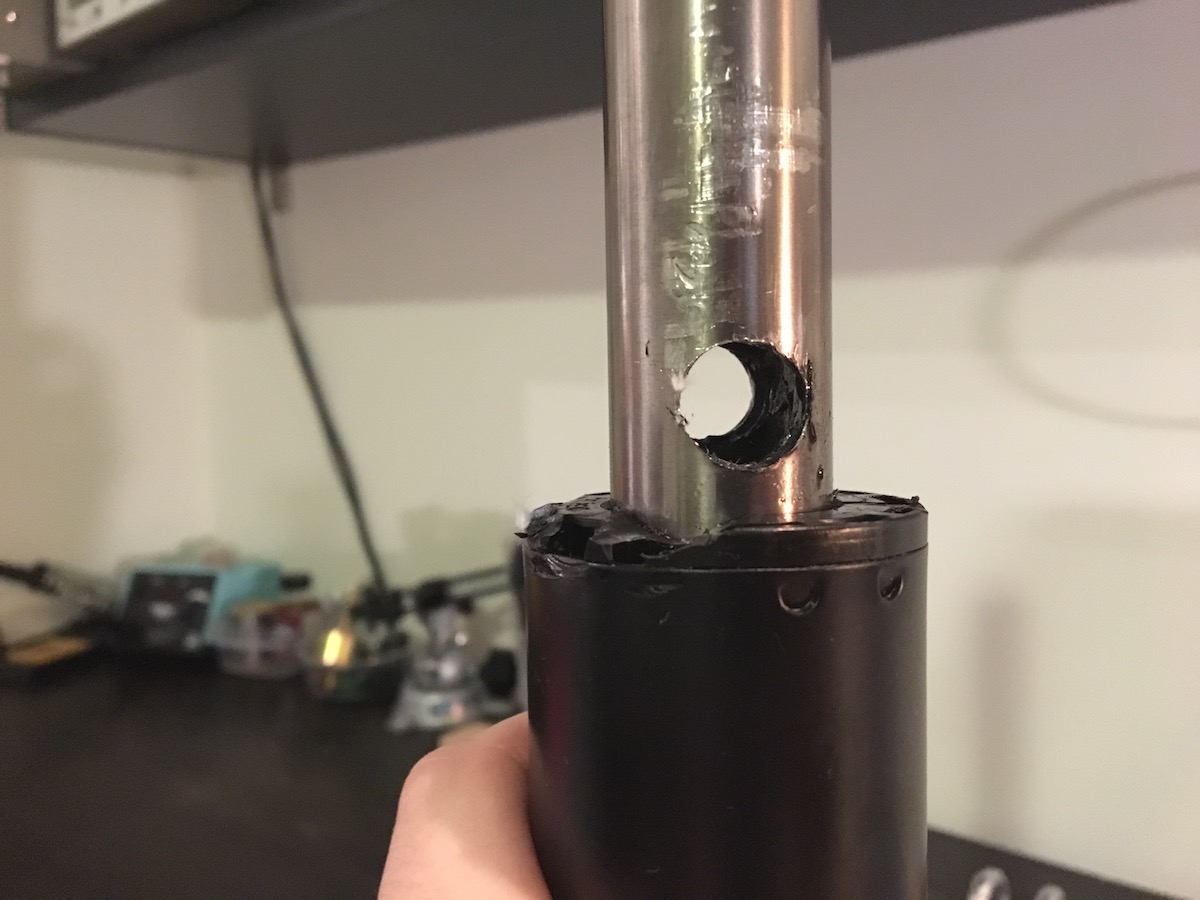
After the hole was drilled, I was able to insert the steel rod into the hole and rotate. Worked a charm! Now I have a perfectly functional chair again.
If you're going to go this route, I would suggest not doing it in your kitchen. The metal shavings are difficult to hunt down and pick out of the kitchen mats. -- Also, anticipate some gas release from the inside of the cylinder.
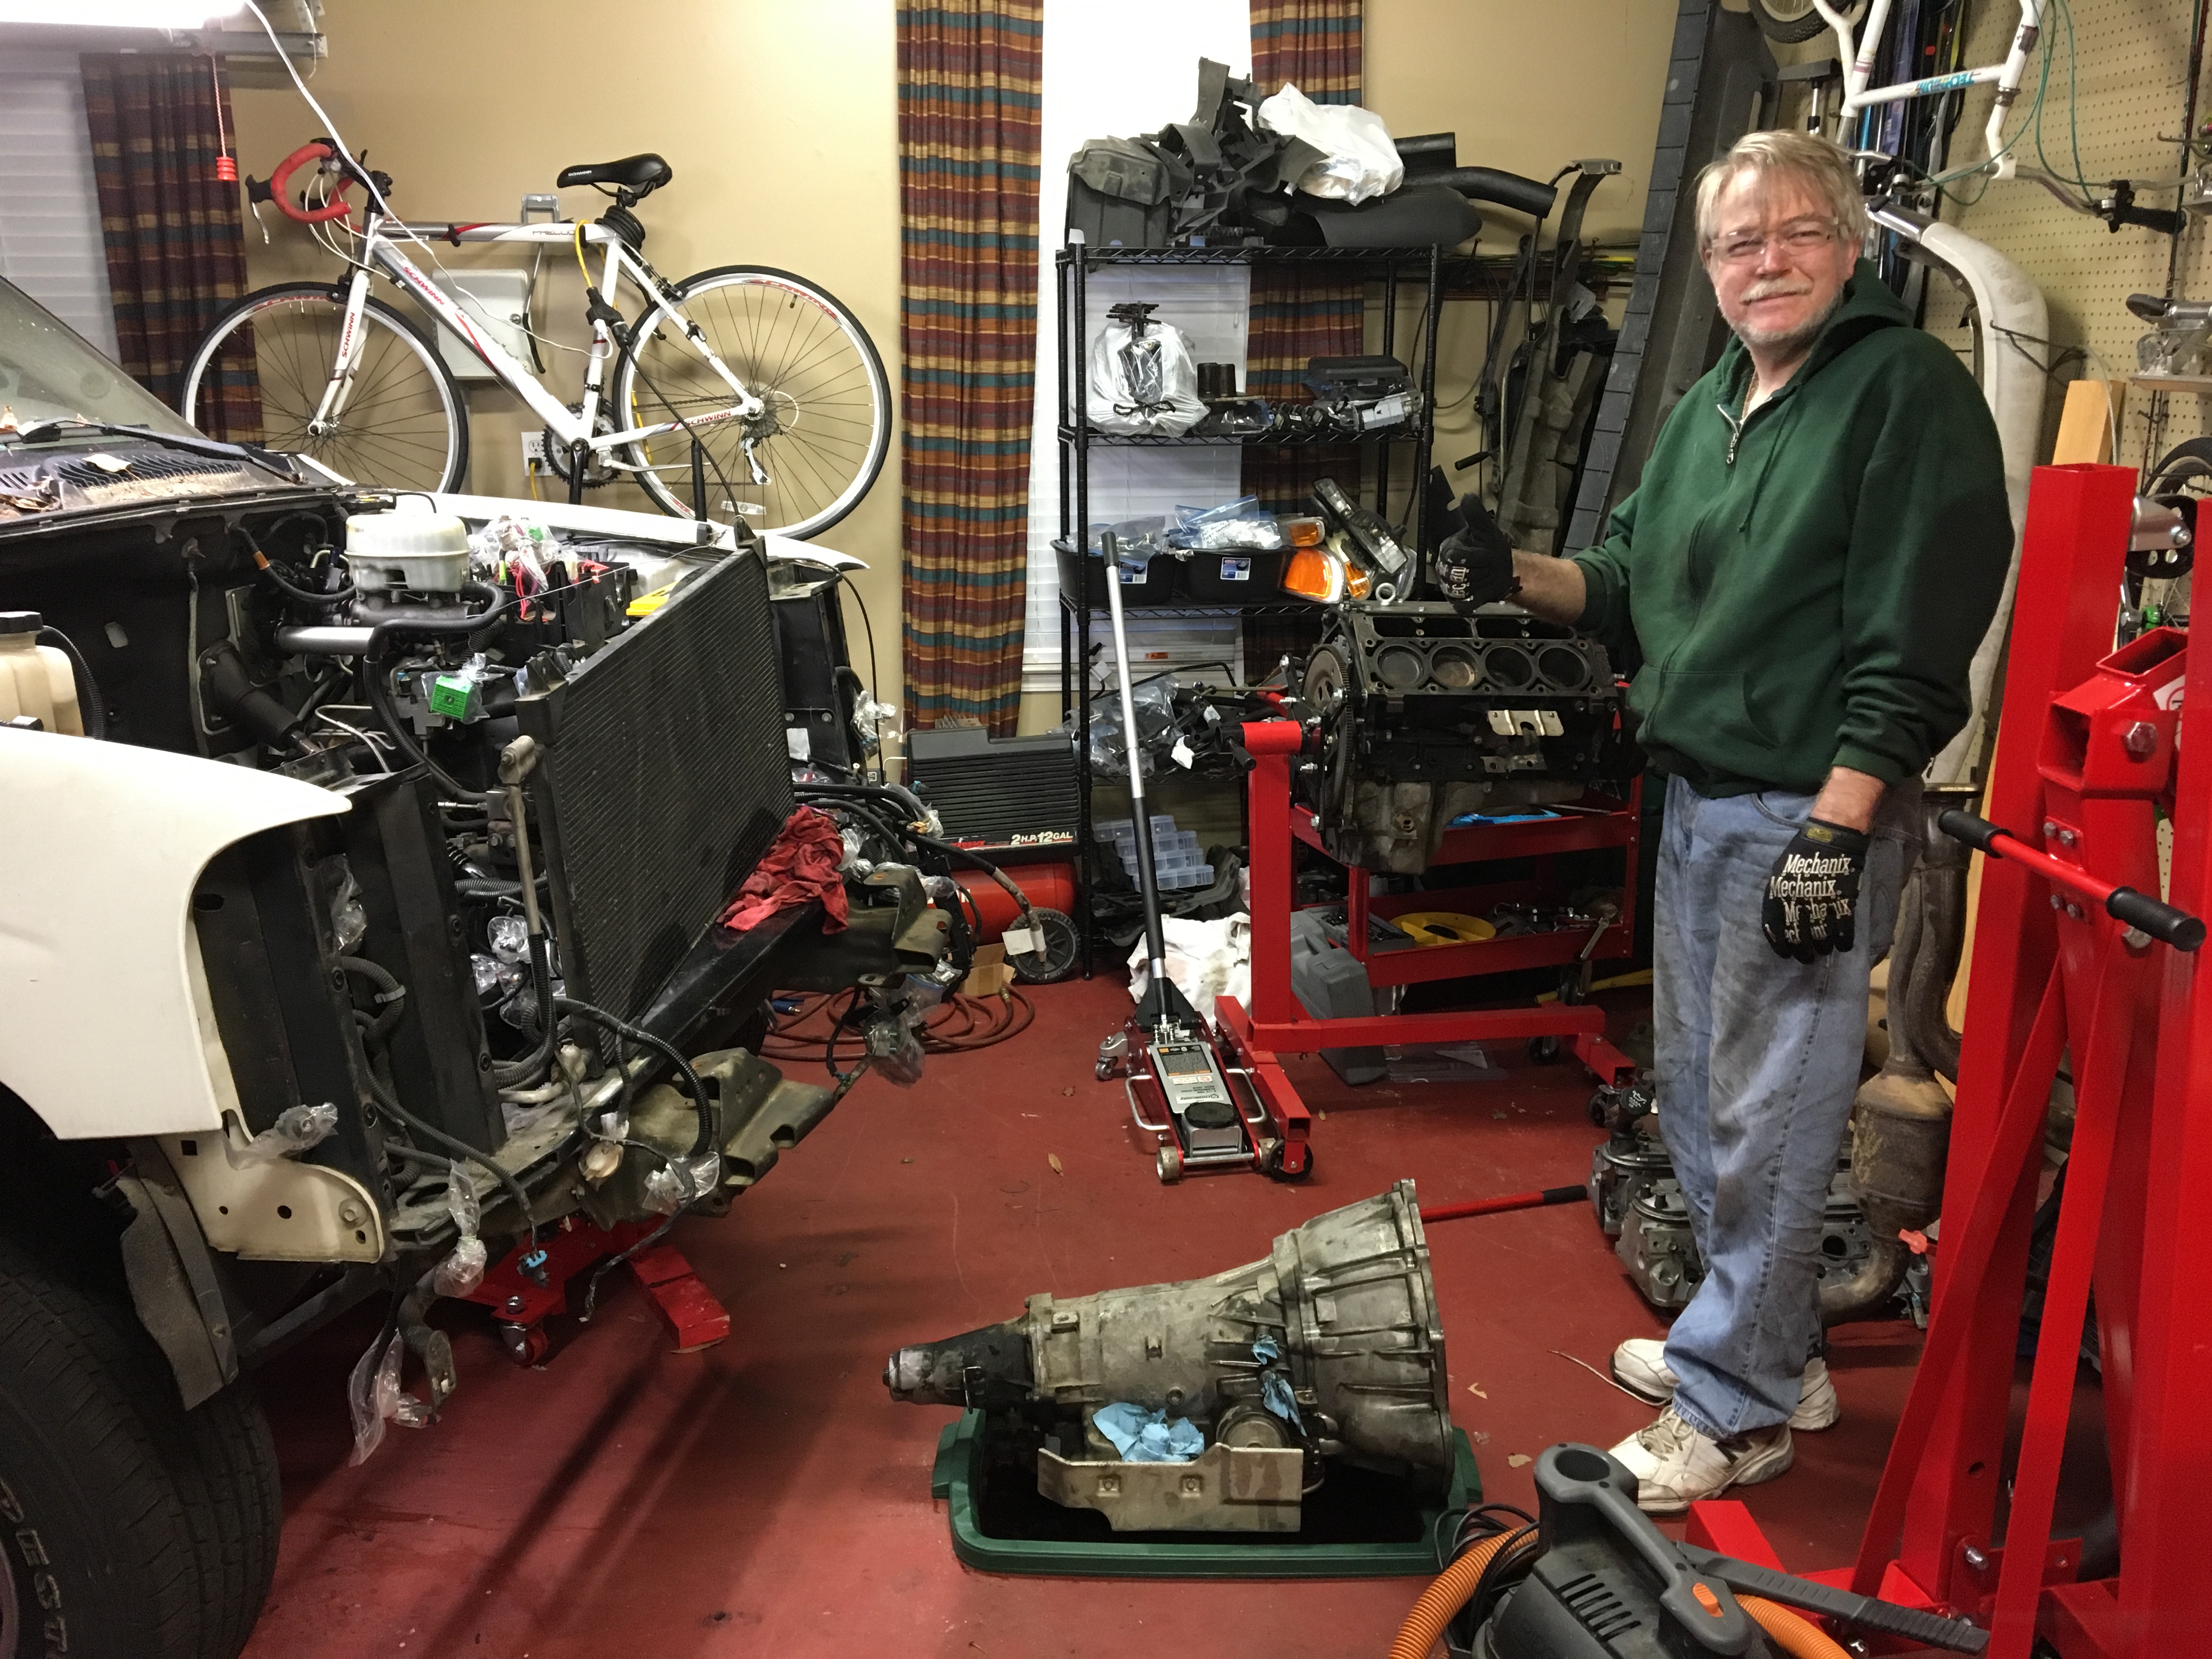
01/8/2017
removing a truck engine
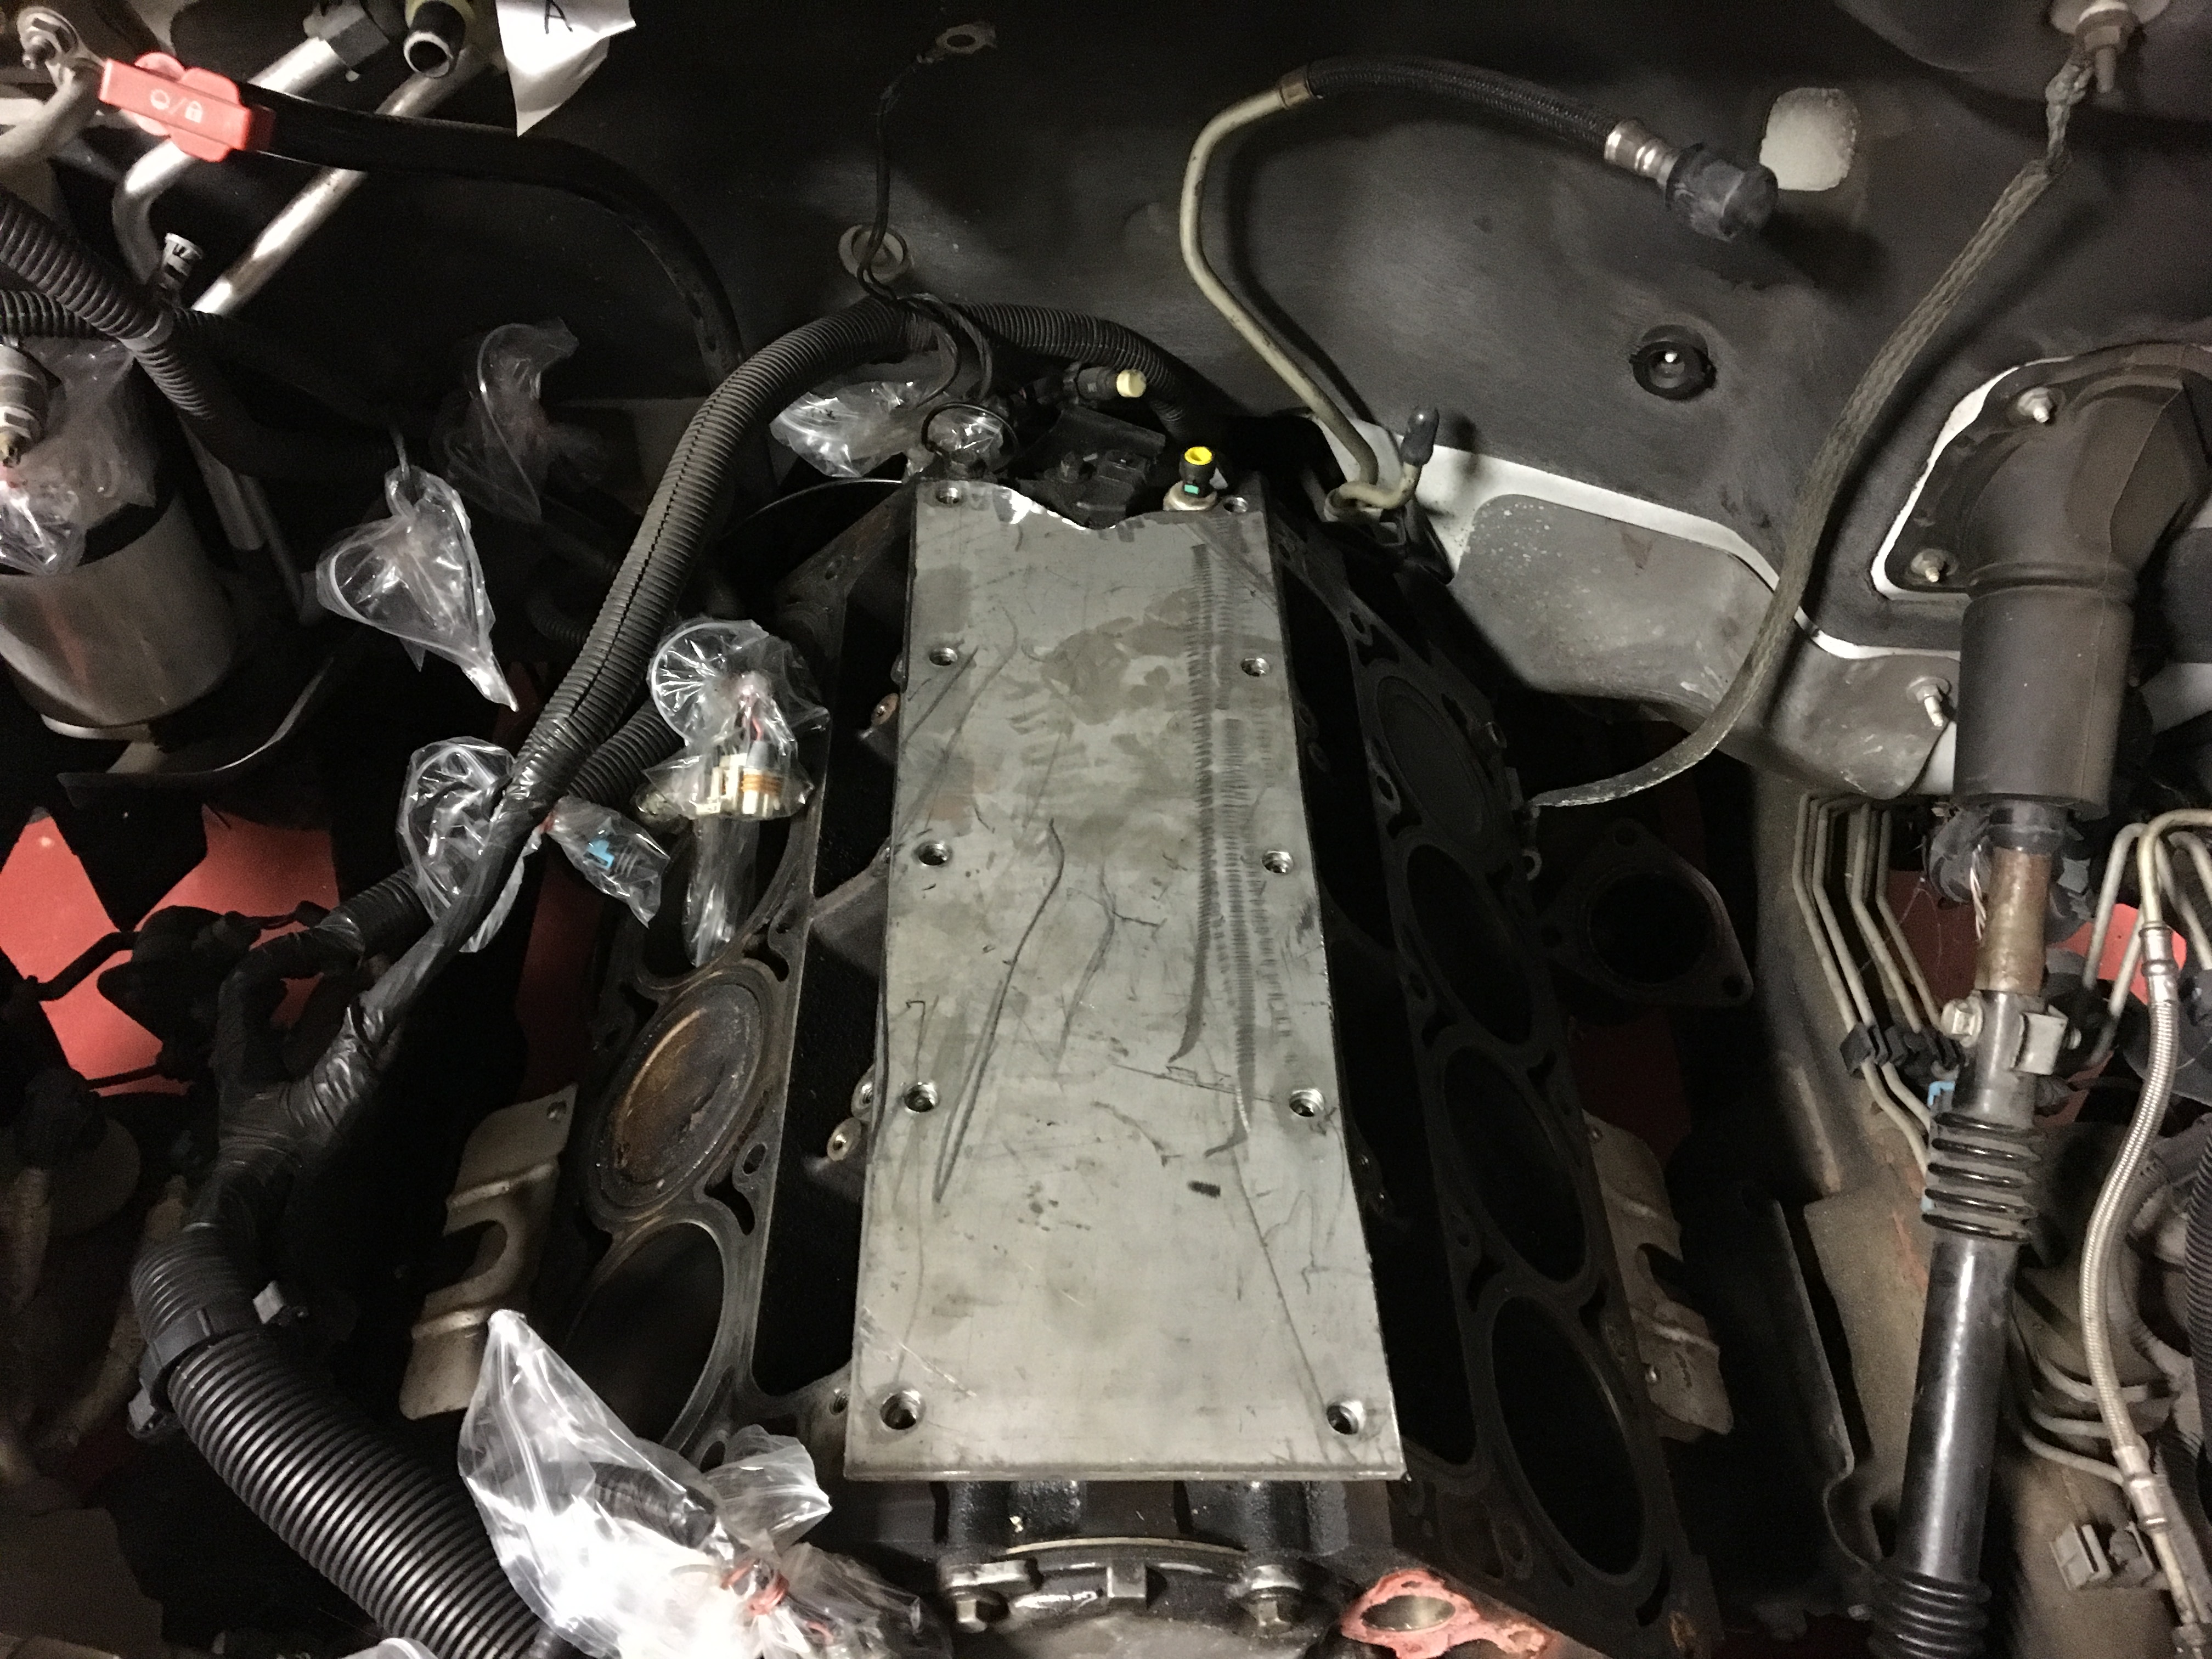
I've been home for the holidays and helping my dad get further on his engine rebuild project for our family's Yukon. This is just a quick entry to document the fun I had with my dad.
The main thing I did to help out was fabricate a cover plate out of some steel plate to hoist the engine. I traced the outline and hole pattern using the valley cover and used an angle grinder with a cutoff wheel to cut the outline. A step drill made easy work of the mounting holes.
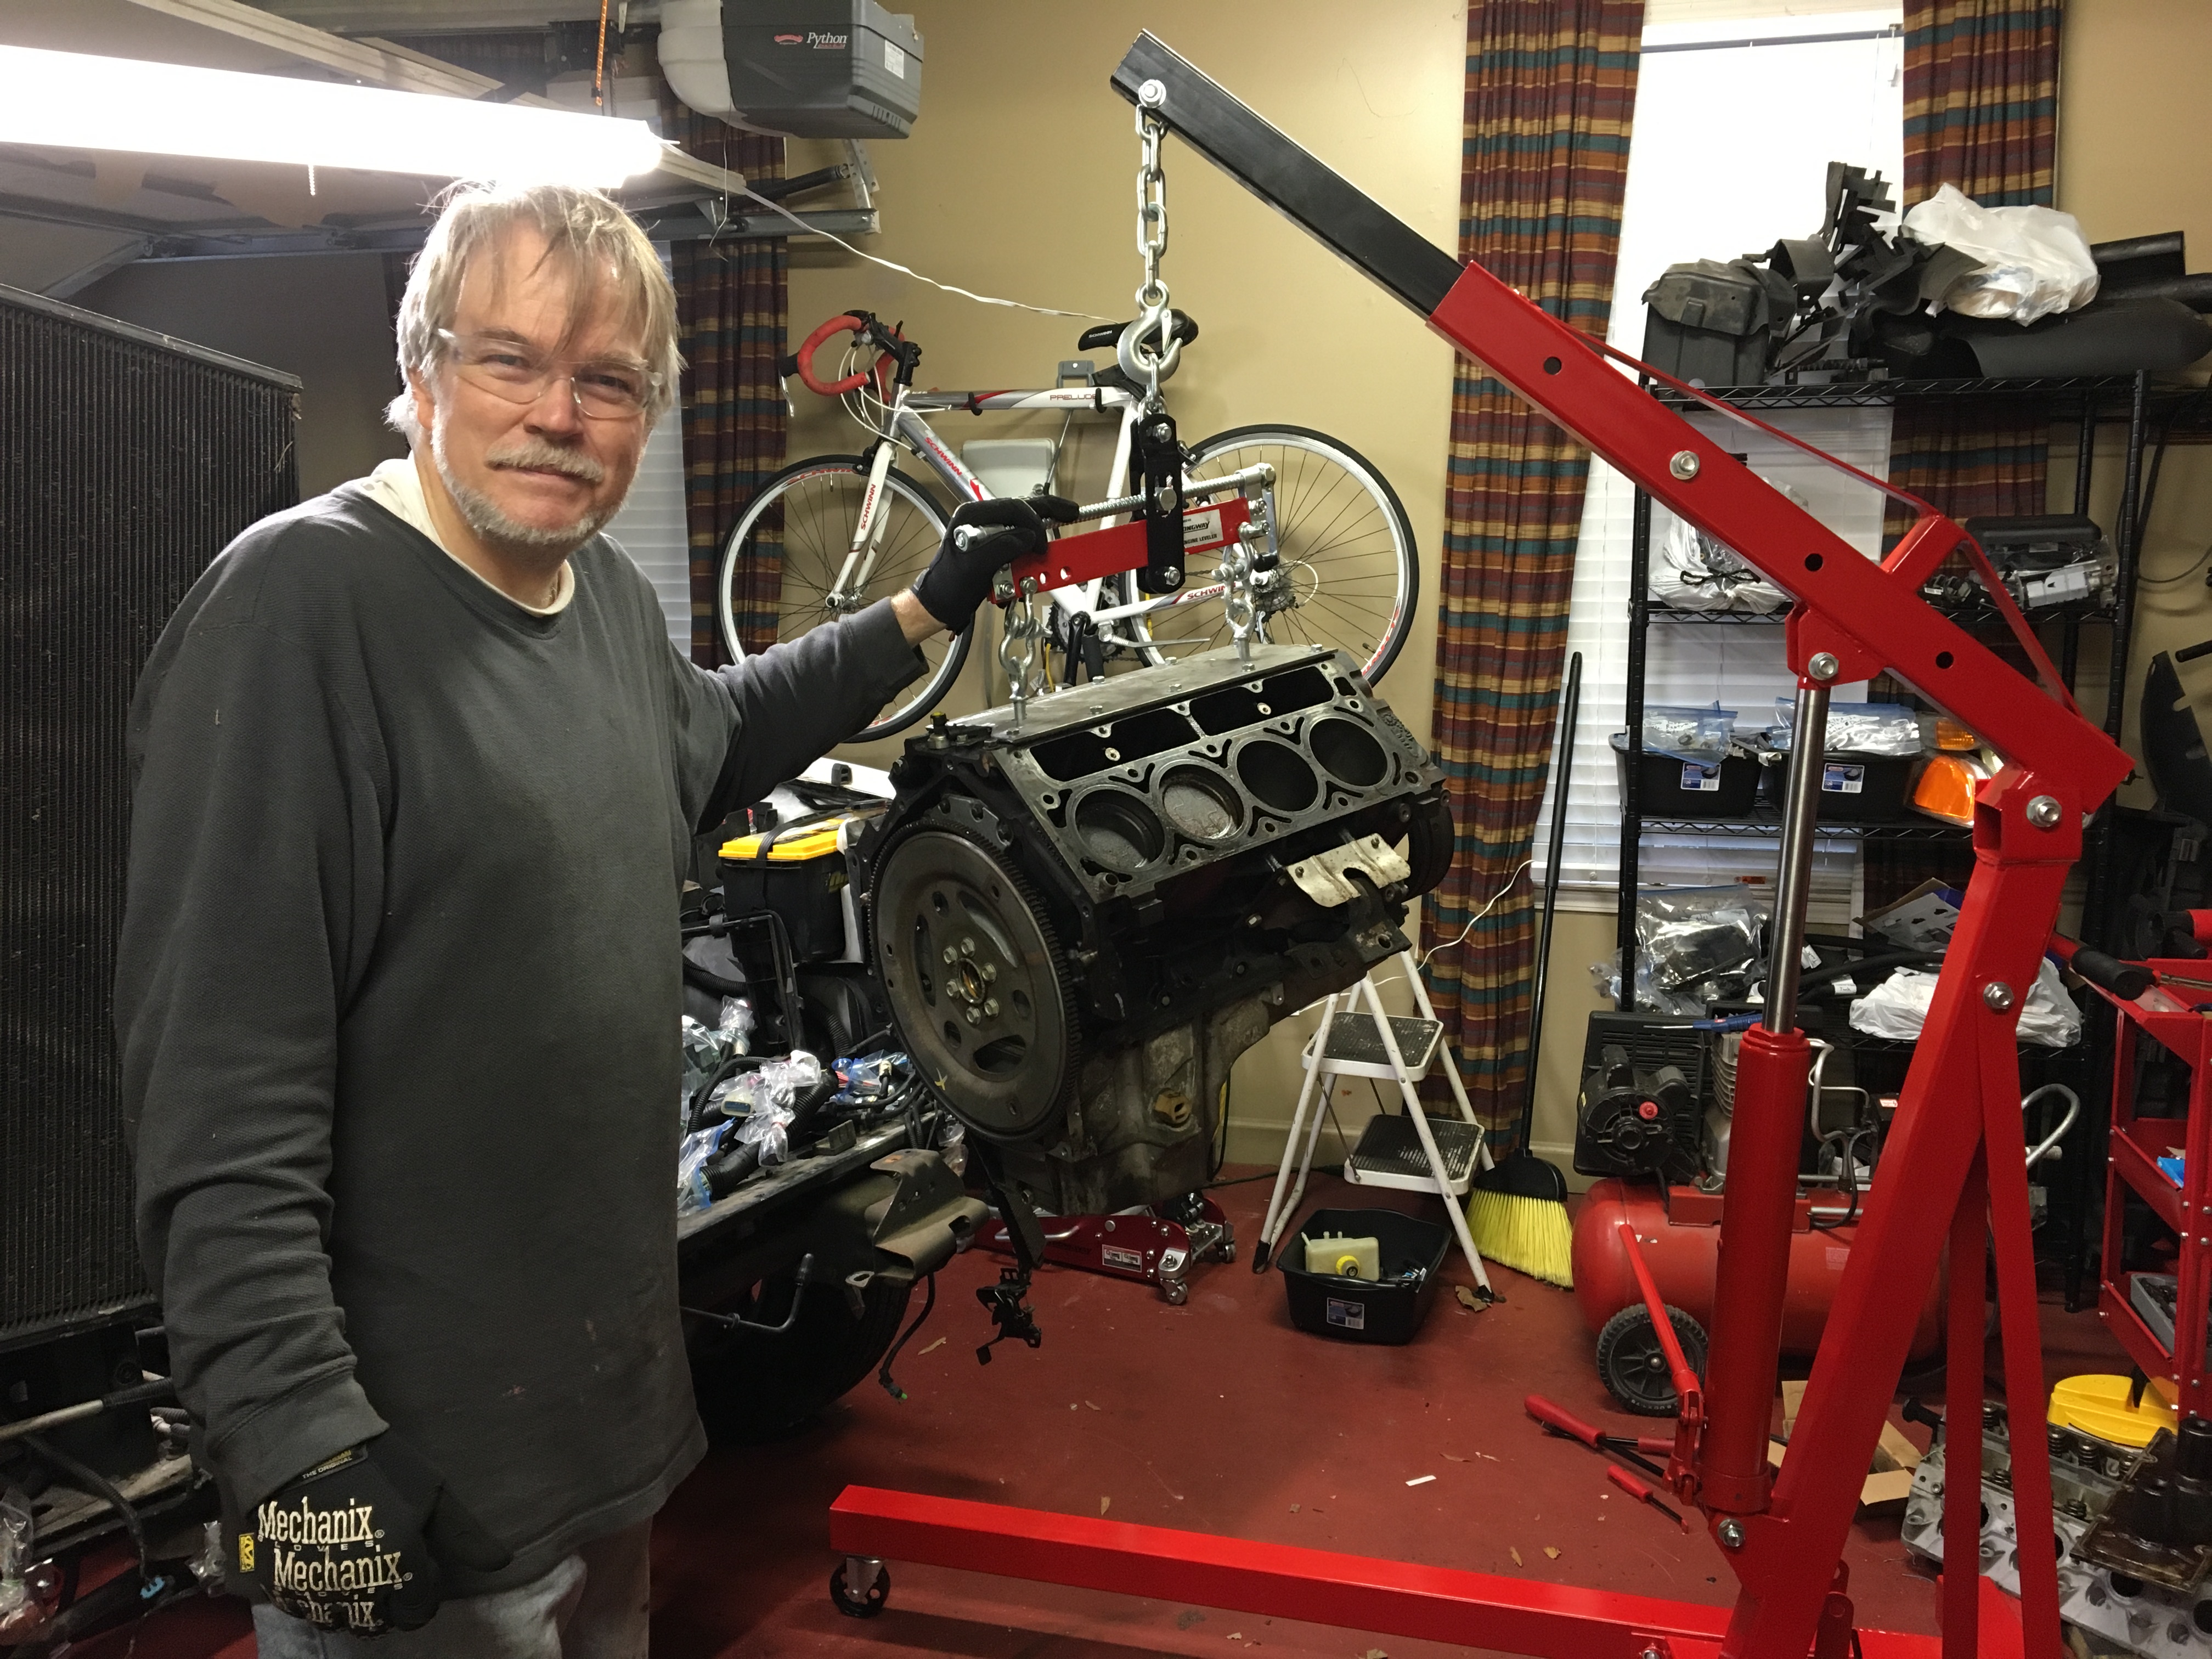
After I made sure the hole pattern was correct and it would fit, I drilled two holes in the top to mount the engine hoist to. Here's a photo of my dad, smiling since he's been trying to get the engine out for a while.
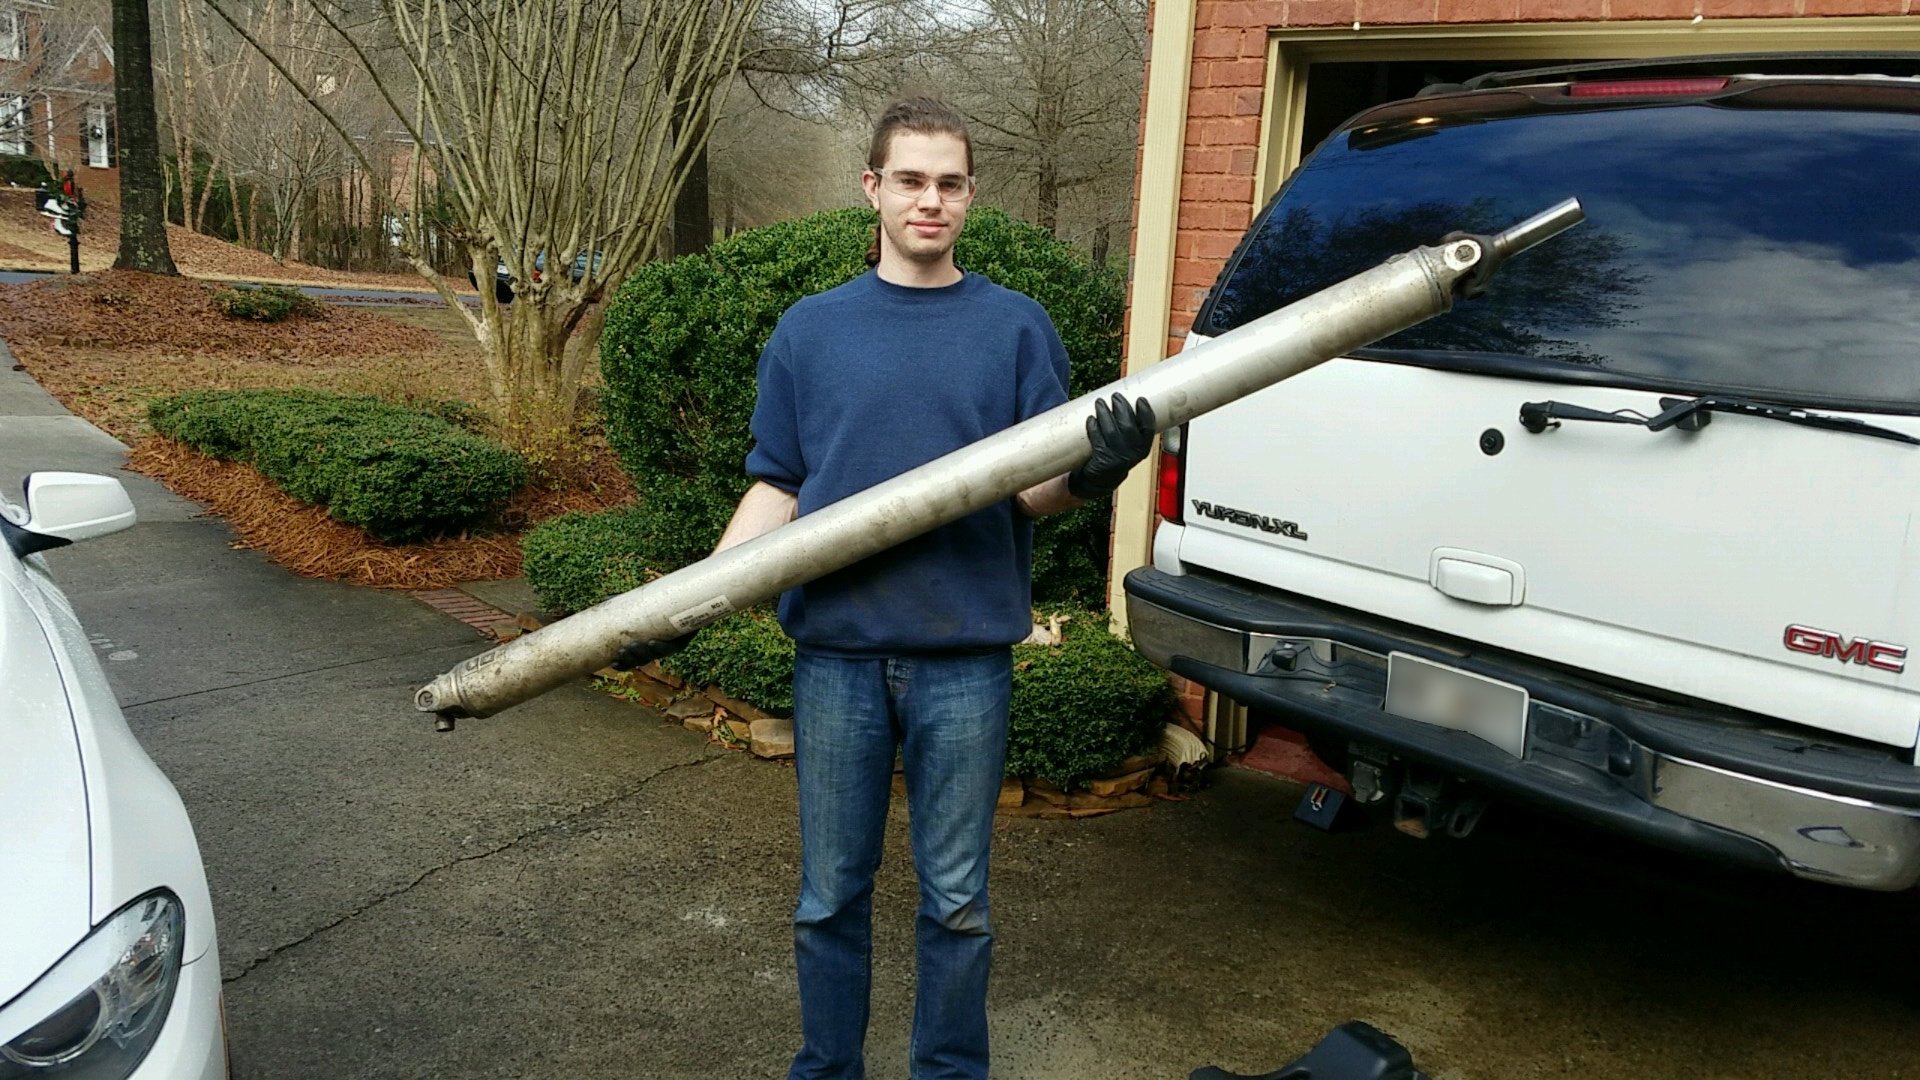
To get the transmission out, the driveshaft had to come out. So here's me with a driveshaft.
The transmission came out with a transmission jack. We didn't have enough height under the frame of the car to roll it out on the jack, so we lifted it off the jack onto a plastic storage container top. Once it was on the top it slid right out from under the car. We technically could have removed the engine and the transmission as one unit, but our garage didn't have enough space to do so.
Anyway, here's another photo of my dad smiling with a thumbs up. This time with the transmission.
01/4/2017
simulating a clock of clocks
I saw this video of a really neat clock in a Nike store in Boston a while ago. I don't know who was the first to build one of these things, but there's a few of them. Another really gorgeous one is A Million Times by an art studio in Stockholm. Anyway, I really want to make one.
I've been eying some really tiny stepper motors and I've bought a few on Alibaba and Ebay to see what they're like. I'm not 100% sure how I'd like to structure the hardware, but it seems like I could make a whole bunch of tiny networked clock modules, each controlling two stepper motors. While I'm figuring that out, I wanted to play with how it would look. So I decided to learn a bit about p5.js which is a Javascript port of Processing.
I don't think the code is anything special. Since this was meant to be a simulation of the motors themselves, each pair of hands is driven by virtual motors which can be assigned a speed, as opposed to being assigned a position. I did have a bit of fun implementing the easing to slow the hands down before reaching their final places. I also introduced a bit of randomness in the travel time of each hand to reach the new destination, this gives the display a cool "convergence" effect.
Here's a short clip. Sorry that it doesn't display actual times, just random 4-digit numbers.